Crafting Recognition: Integrating the DIY Microphone Trophy into Your Creative Workflow
In an era where digital assets dominate our professional landscapes, there remains a distinct and powerful value in tangible recognition. The DIY Microphone Trophy - 3d Papercraft represents more than just a weekend hobby; it is a strategic tool for creators, educators, and small business owners looking to inject personality and physical presence into their workflows. Whether you are organizing a podcast awards ceremony, celebrating a milestone in a marketing campaign, or creating a unique prop for content creation, this project bridges the gap between digital planning and physical execution.
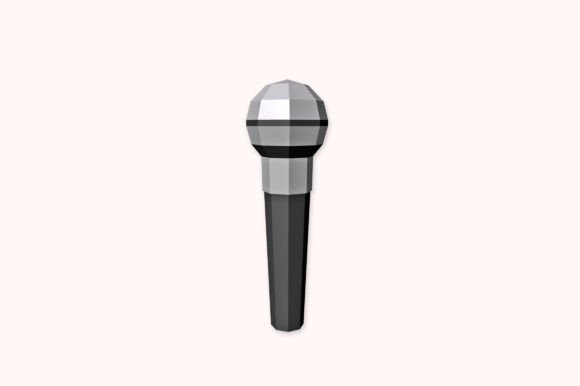
This guide explores how to effectively integrate the assembly of a 3D paper microphone trophy into your existing processes. With an assembled size of 30 x 9 x 9 CMS and a manageable assembling time of just one hour, this project offers a high-impact output with minimal resource overhead. By understanding the preparation, execution, and application phases, you can leverage these Microphone Digital Files to enhance engagement and celebrate achievements in a memorable way.
Strategic Preparation and Asset Management
Successful implementation of any physical craft project begins long before the first cut is made. It starts with asset acquisition and workflow alignment. When you purchase the package for the DIY Microphone Trophy, you receive a versatile suite of files including PDF, EPS, DXF, and PNG formats. This variety is crucial for compatibility across different professional environments.
For the standard office or home studio setup, the PDF file is your primary workhorse. It ensures that the templates print at the correct scale on standard A4 or Letter cardstock without requiring specialized design software. However, for users with access to laser cutters or CNC machines—common in maker spaces or advanced prototyping labs—the DXF and EPS files allow for automated precision. This flexibility means the project can scale from a single handmade unit to a batch production run for larger events without altering the design integrity.
Preparation also involves gathering the right physical tools. To maintain efficiency and quality control, ensure your workspace is equipped with the following essentials:
- Colored Printer: Essential for rendering the vibrant textures and details of the microphone design directly onto the material.
- A4 Letter Cardstock Paper: The structural foundation. Using paper with appropriate weight (typically 200gsm to 300gsm) ensures the final 30cm structure holds its shape without warping.
- Precision Cutting Tools: Scissors for broad strokes and a craft knife for intricate internal details.
- Scoring Implements: A scorer, bone folder, or even a non-working ballpoint pen is critical for creating clean fold lines.
- Adhesives and Measurement: High-quality glue and a ruler for accurate alignment.
Treating these materials as part of your standard inventory allows you to deploy this project quickly whenever the need for recognition arises, reducing lead time from concept to completion.
The Assembly Process: Efficiency and Precision
The core of this workflow is the assembly phase, designed to be completed within approximately one hour. This timeframe makes it feasible to integrate into a busy schedule, perhaps during a break in content production or as a focused team-building activity. The process follows a logical sequence that mirrors standard manufacturing protocols: Print, Cut, Score, Fold, and Assemble.
Begin by printing the templates full size. It is imperative to verify your printer settings to ensure "Actual Size" or "100% Scale" is selected; scaling errors here can compromise the fit of the tabs and flaps later. Once printed, the cutting phase requires attention to detail. Use the craft knife for tight corners and the scissors for long edges. This stage is where patience pays off; ragged edges can detract from the professional finish of the final trophy.
Scoring is perhaps the most overlooked yet vital step in papercraft engineering. Before folding any line, run your scorer or non-working ballpoint pen along the designated fold lines using a ruler as a guide. This compresses the fibers of the cardstock, allowing for sharp, crisp bends rather than rounded, weak creases. This technique is what gives the DIY Microphone Trophy its structural rigidity and aesthetic polish.
During assembly, apply glue sparingly to the flaps. Over-saturation can cause the paper to warp or the ink to bleed, affecting the visual quality. Work systematically, attaching larger structural components first before moving to smaller detailing pieces. The result is a freestanding microphone model measuring 30 x 9 x 9 CMS—a substantial presence that commands attention on a desk or stage.
Integrating Tangible Rewards into Digital Workflows
Why incorporate a physical papercraft project into a predominantly digital workflow? The answer lies in the psychological impact of tangible objects. For podcasters, streamers, and audio professionals, the microphone is an iconic symbol of their trade. Presenting a custom-made 3D replica serves as a potent token of appreciation that digital badges or emails cannot replicate.
Consider the use case of a content creator launching a new series. Before the first episode airs, assembling these trophies can serve as a goal-setting ritual. They become physical manifestations of targets, such as reaching a specific number of subscribers or completing a seasonal arc. Placing the unfinished components on a workspace can act as a visual reminder of the project's trajectory, keeping the team motivated.
For educators and workshop facilitators, this project fits seamlessly into curriculum planning. It can be used as a culminating activity for a module on audio production or media studies. Students not only learn about the symbolism of the industry but also engage in the tactile process of construction, reinforcing fine motor skills and spatial reasoning. The availability of DXF files further extends this into STEM education, where students can explore the transition from 2D vectors to 3D objects using technology.
In a corporate or agency setting, these trophies can be utilized for internal recognition programs. Instead of generic plaques, a hand-assembled microphone trophy adds a layer of personal effort and thoughtfulness. It signals that the recipient's contribution to communication and voice is valued. Because the assembly time is short, managers or team leads can produce these in-house without relying on external vendors, allowing for rapid deployment of rewards immediately following a successful project milestone.
Quality Control and Long-Term Durability
To ensure the longevity of your creation, consider the environment in which the trophy will reside. While cardstock is durable, it is susceptible to moisture and direct sunlight over extended periods. If the trophy is intended for long-term display in a high-traffic area, applying a clear sealant spray can protect the printed colors and add structural stiffness. This small additional step transforms a temporary craft into a lasting keepsake.
Consistency is key if you are producing multiple units. Establish a small assembly line process: one person cuts, another scores, and a third assembles. This division of labor not only speeds up production but also ensures that each unit meets the same quality standards. Keep a log of which glue brands work best with your specific cardstock choice to maintain consistency across future batches.
Furthermore, the modular nature of papercraft allows for customization. You can easily modify the digital files to include names, dates, or specific logos before printing, making each trophy unique to the recipient. This level of personalization enhances the perceived value of the award and strengthens the connection between the giver and the receiver.
Conclusion: The Value of Hands-On Creation
The DIY Microphone Trophy - 3d Papercraft is a testament to the power of simple materials executed with precision. It fits naturally into the workflows of modern professionals who seek to balance digital efficiency with human touch. By leveraging the provided digital files and adhering to a structured assembly process, you can create meaningful, physical artifacts that celebrate success and inspire creativity.
Whether used as a motivational tool, an educational resource, or a bespoke award, this project demonstrates that impactful results do not always require complex machinery or expensive materials. Sometimes, all it takes is a sheet of cardstock, a few basic tools, and an hour of focused effort to create something truly remarkable. If you encounter any challenges during the printing or assembly process, remember that support is available; do not hesitate to reach out with questions to ensure your project proceeds smoothly.